If you take a fresh Windows 11 box out of its box, sign in with a personal Microsoft account, click Next on every prompt, and join the home Wi-Fi — you have an endpoint that an opportunistic attacker can do real damage to. Not because Windows 11 is bad. Because Windows 11 ships configured for the lowest-common-denominator home user, and small businesses keep buying it that way and putting it on the front desk.
The good news: bringing a Windows 11 laptop up to a defensible baseline takes about fifteen minutes and zero extra licenses (everything below works on Win11 Pro, no Defender for Endpoint or Intune required).
🛡️ Lock Down Windows 11 in 15 Minutes: A Hardening Checklist
This is a stripped-down version of the same baseline I apply to every Windows endpoint we deploy at Rainier IT — front desks, accountants, owner laptops, the works. By the end you’ll have full-disk encryption with the recovery key off the machine, a non-admin daily-use account, Microsoft Defender hardened beyond its defaults, a curated set of ASR rules in block mode, telemetry trimmed, and bloatware removed. Everything is reversible, and most of it is one PowerShell line.
📋 Prerequisites
- Windows 11 Pro (Home doesn’t expose BitLocker, gpedit, or most of the policy surface — see Why your SMB needs Windows 11 Pro, not Home for the long version).
- A TPM 2.0 chip and Secure Boot enabled in firmware. Required for Windows 11 to install anyway, but worth verifying — older hardware that’s been “hacked” onto Win11 often has one or both disabled.
- Local administrator access. Run PowerShell as Administrator for everything below (right-click → Run as Administrator).
- A way to back up the BitLocker recovery key off the machine. A password manager, a printed sheet in a safe, or your MSP’s key-escrow system. Not a Word doc on the same disk.
🔍 Step 1: Verify the Foundation (TPM + Secure Boot)
Everything below assumes the hardware is set up correctly. Two one-liners confirm it:
# Confirm TPM 2.0 is present, enabled, and owned by the OS
Get-Tpm | Select-Object TpmPresent, TpmReady, TpmEnabled, TpmActivated, ManufacturerVersion

# Confirm Secure Boot is on
Confirm-SecureBootUEFIGet-Tpm should return True across the board. Confirm-SecureBootUEFI returns True if Secure Boot is on, False if it’s off, and throws if the firmware is in legacy/CSM mode. If either is wrong, reboot into UEFI (F2/Del/F10 depending on vendor) and turn them on before continuing — encrypting a disk without TPM-backed key storage gives you BitLocker on hard mode.
🔒 Step 2: BitLocker the System Drive
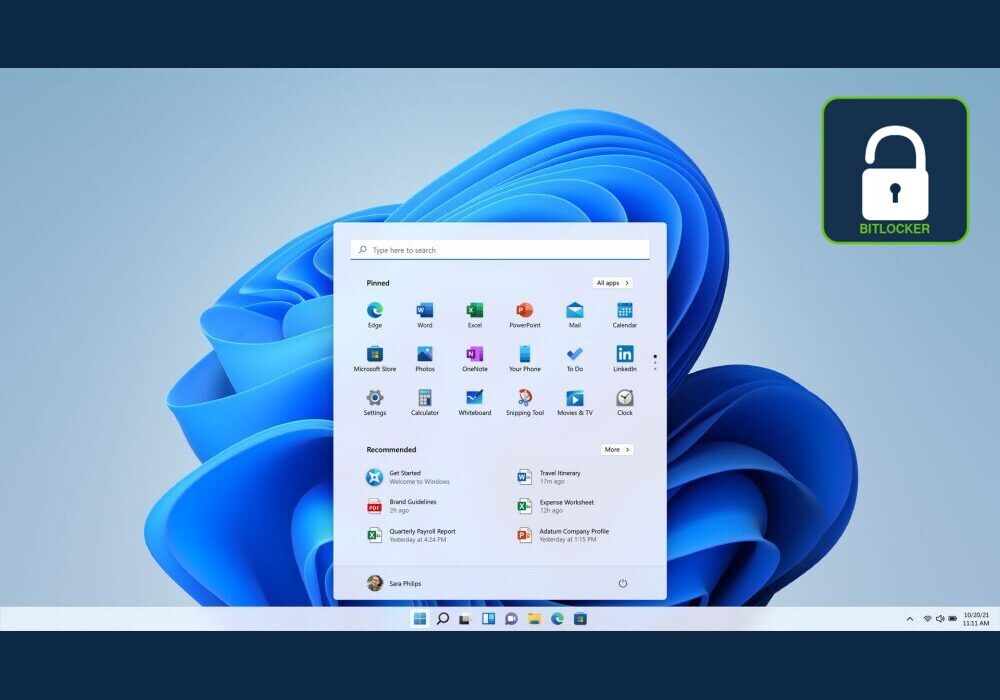
Full-disk encryption is the single biggest mitigation against laptop theft, lost-on-the-plane, and “the office got broken into over the weekend.” Windows 11 Pro includes it for free. The default GUI flow (Settings → System → Storage → Drives → Turn on BitLocker) works fine, but PowerShell is faster and easier to script across a fleet:
# Encrypt C: with XTS-AES 256, used-space only (fast — extends as you fill the disk)
Enable-BitLocker -MountPoint "C:" `
    -EncryptionMethod XtsAes256 `
    -UsedSpaceOnly `
    -TpmProtector

# Add a recovery password (this is what you write down)
Add-BitLockerKeyProtector -MountPoint "C:" -RecoveryPasswordProtector

# Print the recovery password to stdout — copy it to your password manager NOW
(Get-BitLockerVolume -MountPoint "C:").KeyProtector |
    Where-Object KeyProtectorType -EQ 'RecoveryPassword' |
Select-Object -ExpandProperty RecoveryPasswordA few important notes:
- The recovery password is your only way back in if the TPM clears (BIOS update, motherboard swap, certain Windows updates). Lose it and the drive is gone. Back it up off the machine before you reboot.
-UsedSpaceOnlymeans encryption finishes in minutes instead of hours on a mostly-empty disk. Newly-written blocks get encrypted as they’re written. Fine for a new build; use-FullDiskif you’re encrypting a drive that’s had unencrypted data on it before.- Check status any time with
Get-BitLockerVolume.VolumeStatusshould readFullyEncrypted.
If you manage more than five Windows boxes, set up BitLocker key escrow — Entra ID / Active Directory backs it up automatically; for standalone machines, an MSP-managed password vault like the one we use at Rainier IT works.
👤 Step 3: Stop Running as Administrator
Most Windows compromises don’t start with a zero-day. They start with a user clicking on something while logged in as a local admin, and the malware silently inheriting that admin token. Standard-user accounts plus a real UAC prompt close the door on the entire commodity-malware category.
The pattern is: one local admin account, one Standard account for daily use.
# Create a dedicated admin account (use a long password from your manager)
$pw = Read-Host -AsSecureString "New password for rainier-admin"
New-LocalUser -Name "rainier-admin" -Password $pw -FullName "Rainier IT Admin" -PasswordNeverExpires
Add-LocalGroupMember -Group "Administrators" -Member "rainier-admin"

# Demote your daily-use account from Administrators to Users
Remove-LocalGroupMember -Group "Administrators" -Member "christopher"
Add-LocalGroupMember -Group "Users" -Member "christopher"Then tighten UAC so it prompts every time an admin token is requested, instead of silently elevating signed Microsoft binaries:
# Always prompt on the secure desktop, even for built-in Windows tools
Set-ItemProperty `
    -Path "HKLM:\SOFTWARE\Microsoft\Windows\CurrentVersion\Policies\System" `
    -Name "ConsentPromptBehaviorAdmin" -Value 2

Set-ItemProperty `
    -Path "HKLM:\SOFTWARE\Microsoft\Windows\CurrentVersion\Policies\System" `
-Name "PromptOnSecureDesktop" -Value 1Reboot, log in as your now-Standard account, and try to install something. UAC should prompt for rainier-admin credentials — that’s the whole win. You haven’t lost any capability; you’ve just made it explicit when admin power is being exercised.
🦠 Step 4: Harden Microsoft Defender
Defender out of the box is good. Defender configured the way an MSP would configure it is meaningfully better. Here are the highest-value settings, distilled from our production baseline (Apply-DefenderBaseline.ps1 — the full version lives in our internal repo and gets pushed by TacticalRMM):
# Core protections — most of these are already on, but worth pinning explicitly
Set-MpPreference `
    -DisableRealtimeMonitoring $false `
    -DisableBehaviorMonitoring $false `
    -DisableScriptScanning $false `
    -MAPSReporting Advanced `
    -SubmitSamplesConsent SendSafeSamples `
    -CloudBlockLevel High `
    -CloudExtendedTimeout 50 `
    -PUAProtection Enabled `
    -EnableNetworkProtection Enabled `
-SignatureUpdateInterval 4What you’re turning on, in plain English:
- **
PUAProtection** — blocks Potentially Unwanted Apps (the bundled-installer crap that comes with “free PDF converter” downloads). Off by default. Huge quality-of-life win for end users. - **
EnableNetworkProtection** — blocks outbound connections to known-malicious IPs and domains at the Defender layer, before your browser even tries to load them. Phishing-resistant in the best way. - **
CloudBlockLevel High** — Defender will wait longer for a cloud verdict on an unknown binary and lean toward blocking. Adds a few hundred ms to first-launch of new programs; pays for itself the first time it stops a payload. - **
SubmitSamplesConsent SendSafeSamples** — auto-submits non-PII samples to Microsoft so the next person who sees the same threat gets a faster verdict. The community immune system.
Attack Surface Reduction (ASR) rules
This is where Defender goes from “antivirus” to “actual EDR-lite.” ASR is a set of behavior-based blocks for the techniques real attackers actually use — Office spawning child processes, scripts pulling executables, LSASS getting scraped. Most of these have near-zero false positives. A few need to be audited before flipping to block.
Here are the rules I block on every endpoint by default. Run this as is — it’s idempotent and safe to re-run:
# ASR rule IDs in BLOCK mode (Action = 1)
# Reference: learn.microsoft.com/defender-endpoint/attack-surface-reduction-rules-reference
$asrBlock = @{
    # Block credential stealing from LSASS
    '9e6c4e1f-7d60-472f-ba1a-a39ef669e4b2' = 1
    # Block Office apps from creating child processes
    'd4f940ab-401b-4efc-aadc-ad5f3c50688a' = 1
    # Block Office apps from creating executable content
    '3b576869-a4ec-4529-8536-b80a7769e899' = 1
    # Block Office apps from injecting code into other processes
    '75668c1f-73b5-4cf0-bb93-3ecf5cb7cc84' = 1
    # Block JS/VBScript from launching downloaded executable content
    'd3e037e1-3eb8-44c8-a917-57927947596d' = 1
    # Block execution of potentially obfuscated scripts
    '5beb7efe-fd9a-4556-801d-275e5ffc04cc' = 1
    # Block Win32 API calls from Office macros
    '92e97fa1-2edf-4476-bdd6-9dd0b4dddc7b' = 1
    # Block executable content from email and webmail
    'be9ba2d9-53ea-4cdc-84e5-9b1eeeee46550' = 1
    # Block persistence through WMI event subscription
    'e6db77e5-3df2-4cf1-b95a-636979351e5b' = 1
    # Block credential theft via Adobe Reader child processes
    '7674ba52-37eb-4a4f-a9a1-f0f9a1619a2c' = 1
}

foreach ($id in $asrBlock.Keys) {
    Add-MpPreference -AttackSurfaceReductionRules_Ids $id `
                     -AttackSurfaceReductionRules_Actions $asrBlock[$id]
}

# Verify
(Get-MpPreference).AttackSurfaceReductionRules_IdsIf something stops working after this (a niche line-of-business app, a macro-heavy spreadsheet someone built in 2008), check the Defender event log at Event Viewer → Applications and Services → Microsoft → Windows → Windows Defender → Operational. Look for event ID 1121 (block) or 1122 (audit). You can flip a single rule to Audit mode (Action = 2) while you investigate, or to Warn (6) which lets the user bypass with a click.
Tamper Protection
This is the one Defender setting you cannot enable from PowerShell. It exists specifically to stop malware from running PowerShell to turn off the rest of Defender. Enable it manually:
Settings → Privacy & Security → Windows Security → Virus & threat protection → Manage settings → Tamper Protection → On
If you’re on Defender for Business or Endpoint, push it from the portal instead — that’s the only way to make it survive a fresh OS install via policy.
🔥 Step 5: Firewall and SmartScreen
These are mostly correct by default on a fresh Windows 11 install, but every now and again you’ll find a box where someone disabled the firewall to “fix” a printing issue six years ago and never turned it back on. Belt and suspenders:
# Make sure all three firewall profiles are on and default-deny inbound
Set-NetFirewallProfile -Profile Domain,Public,Private -Enabled True
Set-NetFirewallProfile -Profile Public  -DefaultInboundAction Block
Set-NetFirewallProfile -Profile Private -DefaultInboundAction Block

# SmartScreen — block unrecognized apps and downloads
Set-MpPreference -PUAProtection Enabled
Set-ItemProperty `
    -Path "HKLM:\SOFTWARE\Policies\Microsoft\Windows\System" `
    -Name "EnableSmartScreen" -Value 1
Set-ItemProperty `
    -Path "HKLM:\SOFTWARE\Policies\Microsoft\Windows\System" `
-Name "ShellSmartScreenLevel" -Value "Block"While you’re at it, kill SMBv1 if it’s somehow still installed — WannaCry rode that train and the protocol has no legitimate use on a 2026 endpoint:
# Returns "DisabledByDefault" or "Disabled" if you're already fine
Get-WindowsOptionalFeature -Online -FeatureName SMB1Protocol

# Remove it entirely if it's enabled
Disable-WindowsOptionalFeature -Online -FeatureName SMB1Protocol -NoRestart🧹 Step 6: Trim the Telemetry and the Bloatware
Out-of-the-box Win11 ships with a fairly aggressive telemetry default and a small mountain of pre-installed consumer apps that have no business on a work laptop (Solitaire Collection, Clipchamp, Xbox Game Bar, Spotify, the Disney+ shortcut, etc.). None of this is unsafe per se — but every app you don’t need is one more attack surface to patch, one more update prompt to ignore.
Telemetry minimum — Pro can’t go below “Required diagnostic data” (Enterprise/Education can):
Set-ItemProperty `
    -Path "HKLM:\SOFTWARE\Policies\Microsoft\Windows\DataCollection" `
    -Name "AllowTelemetry" -Value 1

# Turn off the lock-screen "tips and tricks" / suggested content
Set-ItemProperty `
    -Path "HKLM:\SOFTWARE\Policies\Microsoft\Windows\CloudContent" `
-Name "DisableWindowsConsumerFeatures" -Value 1Bloatware — the list varies by OEM, but this gets the worst of it:
$bloat = @(
    'Microsoft.XboxApp',
    'Microsoft.XboxGameOverlay',
    'Microsoft.XboxGamingOverlay',
    'Microsoft.XboxIdentityProvider',
    'Microsoft.XboxSpeechToTextOverlay',
    'Microsoft.MicrosoftSolitaireCollection',
    'Microsoft.ZuneMusic',
    'Microsoft.ZuneVideo',
    'Microsoft.BingNews',
    'Microsoft.BingWeather',
    'Microsoft.GetHelp',
    'Microsoft.Getstarted',
    'Microsoft.WindowsFeedbackHub',
    'Microsoft.MixedReality.Portal',
    'Microsoft.YourPhone',
    'Microsoft.Clipchamp'
)

foreach ($pkg in $bloat) {
    Get-AppxPackage -AllUsers -Name $pkg -ErrorAction SilentlyContinue |
        Remove-AppxPackage -AllUsers -ErrorAction SilentlyContinue
    Get-AppxProvisionedPackage -Online |
        Where-Object DisplayName -EQ $pkg |
        Remove-AppxProvisionedPackage -Online -ErrorAction SilentlyContinue
}The -AllUsers flag plus the provisioned-package removal means the apps don’t come back the first time a new user signs in.
🎙️ Bonus: Disable Recall (for the compliance shops)
If you’re on a Copilot+ PC running Windows 11 24H2 or later, Microsoft Recall ships enabled by default and takes a screenshot of your desktop every few seconds for later AI search. For a personal laptop that might be fine. For an endpoint that touches PHI, attorney-client material, financial records, or anything else governed by HIPAA / SEC / state breach-notification law — it’s a non-starter. The Recall snapshot database is encrypted at rest but unlocked the moment the user is signed in, which means any malware running under that user’s token can read every screen the user has ever looked at.
Turn it off:
# Disable Recall snapshot saving system-wide
New-Item -Path "HKLM:\SOFTWARE\Policies\Microsoft\Windows\WindowsAI" -Force | Out-Null
Set-ItemProperty `
    -Path "HKLM:\SOFTWARE\Policies\Microsoft\Windows\WindowsAI" `
-Name "DisableAIDataAnalysis" -Value 1Or from the GUI: Settings → Privacy & Security → Recall & Snapshots → Save snapshots → Off, then Delete snapshots to flush whatever’s already been captured.
✅ The Checklist
If you remember nothing else, work down this list on every new Win11 box:
- [ ] Verify TPM 2.0 is present and Secure Boot is on (
Get-Tpm,Confirm-SecureBootUEFI). - [ ] Enable BitLocker with XTS-AES 256 + TPM protector + RecoveryPassword. Back the recovery key up off the machine.
- [ ] Create a dedicated admin account; demote the daily-use account to Standard User.
- [ ] Tighten UAC to always prompt on the secure desktop.
- [ ] Apply the Defender baseline — cloud-delivered protection High, network protection on, PUA enabled, signature updates every 4 hours.
- [ ] Enable the ASR rule set in block mode; audit and review for false positives in the first week.
- [ ] Enable Tamper Protection (manual, GUI only — or via Defender portal).
- [ ] Confirm firewall is on for all three profiles with default-deny inbound; verify SmartScreen is on.
- [ ] Remove SMBv1 if installed.
- [ ] Trim telemetry to Required + disable consumer-features content.
- [ ] Uninstall bloatware for all users, including provisioned packages.
- [ ] If on a Copilot+ PC and you handle regulated data: disable Recall.
You’re done! A fresh Windows 11 endpoint that walks through this list is harder to break into than 95% of what’s plugged into the average small-business network — without buying a single extra license.
What’s next in this series
This post covers what one administrator can do to one machine in fifteen minutes. The next jump up the maturity curve is doing all of this across a fleet, automatically, with key escrow, drift detection, and someone watching the dashboards at 2 AM. That’s the post coming up after this one — how we run the same baseline (and quite a bit more) across every endpoint we manage at Rainier IT using TacticalRMM, Microsoft Defender, and Huntress as a managed SOC layer on top.
If your shop has more than five Windows endpoints and somebody doesn’t know which ones are encrypted, which ones still have local admin on the daily-use account, and which ones haven’t checked in for patches in six weeks — that’s exactly what we do. Drop me a line at [email protected] or book a free 15-minute audit. Happy to look at one machine with you and tell you honestly whether you need help or whether you’re already doing fine.
Thanks, and stay encrypted!